This is part three in my fun with PowerApps series where I’ll go through my personal experience of creating a new PowerApp from scratch and go through step-by-step for each part of the process…
You can read all parts of this series below:
Part 1: setting up the default gateway
Part 2: creating a data connection
Carrying on from my last post – creating a data connection, we are now good to go and begin to build our first PowerApp!
Just like setting up the data connection, creating a PowerApp can be a really simple thing to do.
However, I’ve found either creating a PowerApp from the SharePoint list or library is really quick and easy, but it doesn’t necessarily give you the most flexibility when it comes to wanting to do it your own way…
Creating a PowerApp
You can create a PowerApp from a list or library literally from the push of a button! Its as simple as:
- Create your list or library, add all the associated columns and data you wish to be displayed in your PowerApp
- Press the ‘PowerApps’ button on the list menu, then press ‘Create an app’
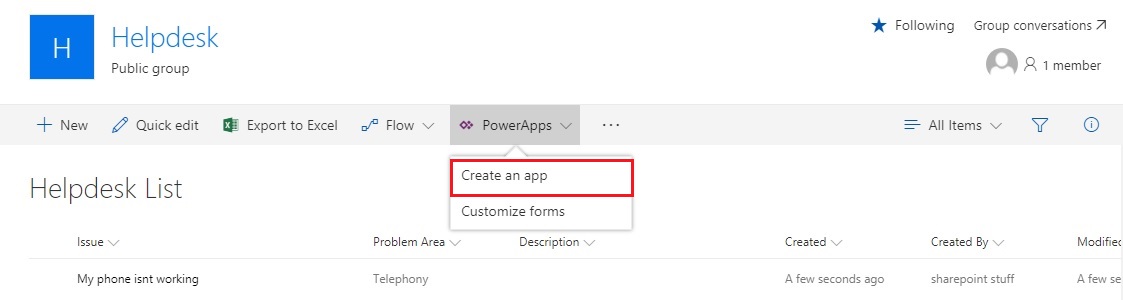
- You’ll then be prompted to create your app, start by giving it a name and press ‘Create’


After a few moments your app will be created! It will open in the PowerApps web editor and you should see your list columns and data displaying in your shiny new PowerApp!

You can also take a look at the app in the preview to get a good look at how it operates and how the data is displayed…

Conclusion…
That’s it! Your all set…but if you’re like me you’ll have some questions. Like, what if I want a desktop app and not a mobile one?
Well for that you’ll need to build an app from scratch, I’ll be going over creating a new PowerApp in the next part of this series so hold on as i’ll be posted the next part very soon!

Leave a Reply