This is part two in my fun with PowerApps series where I’ll go through my personal experience of creating a brand new PowerApp from scratch and go through step-by-step for each part of the process…
You can read part 1 of this series below:
Part 1: setting up the default gateway
Continuing on from my previous post – setting up the default gateway, we should now be in a position to create a new data connection within PowerApps. On the surface this is pretty easy to do, all that’s needed is to choose the connection type – press create – authenticate – job done!
However, when we need to create a data connection for an on premise SharePoint environment, its a little bit of a different story. Here are the steps involved for setting up a new data connection for a SharePoint on premise environment:
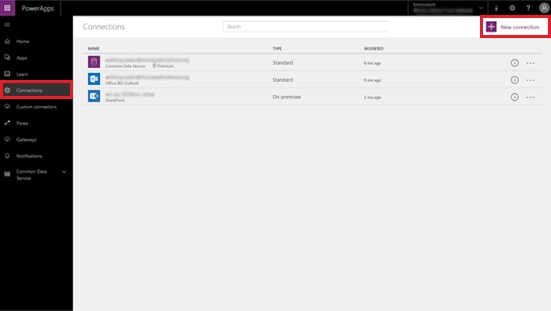
- Go to web.powerapps.com
- Under Connections – press New Connection

- In the search bar, search for “SharePoint” – press the plus icon

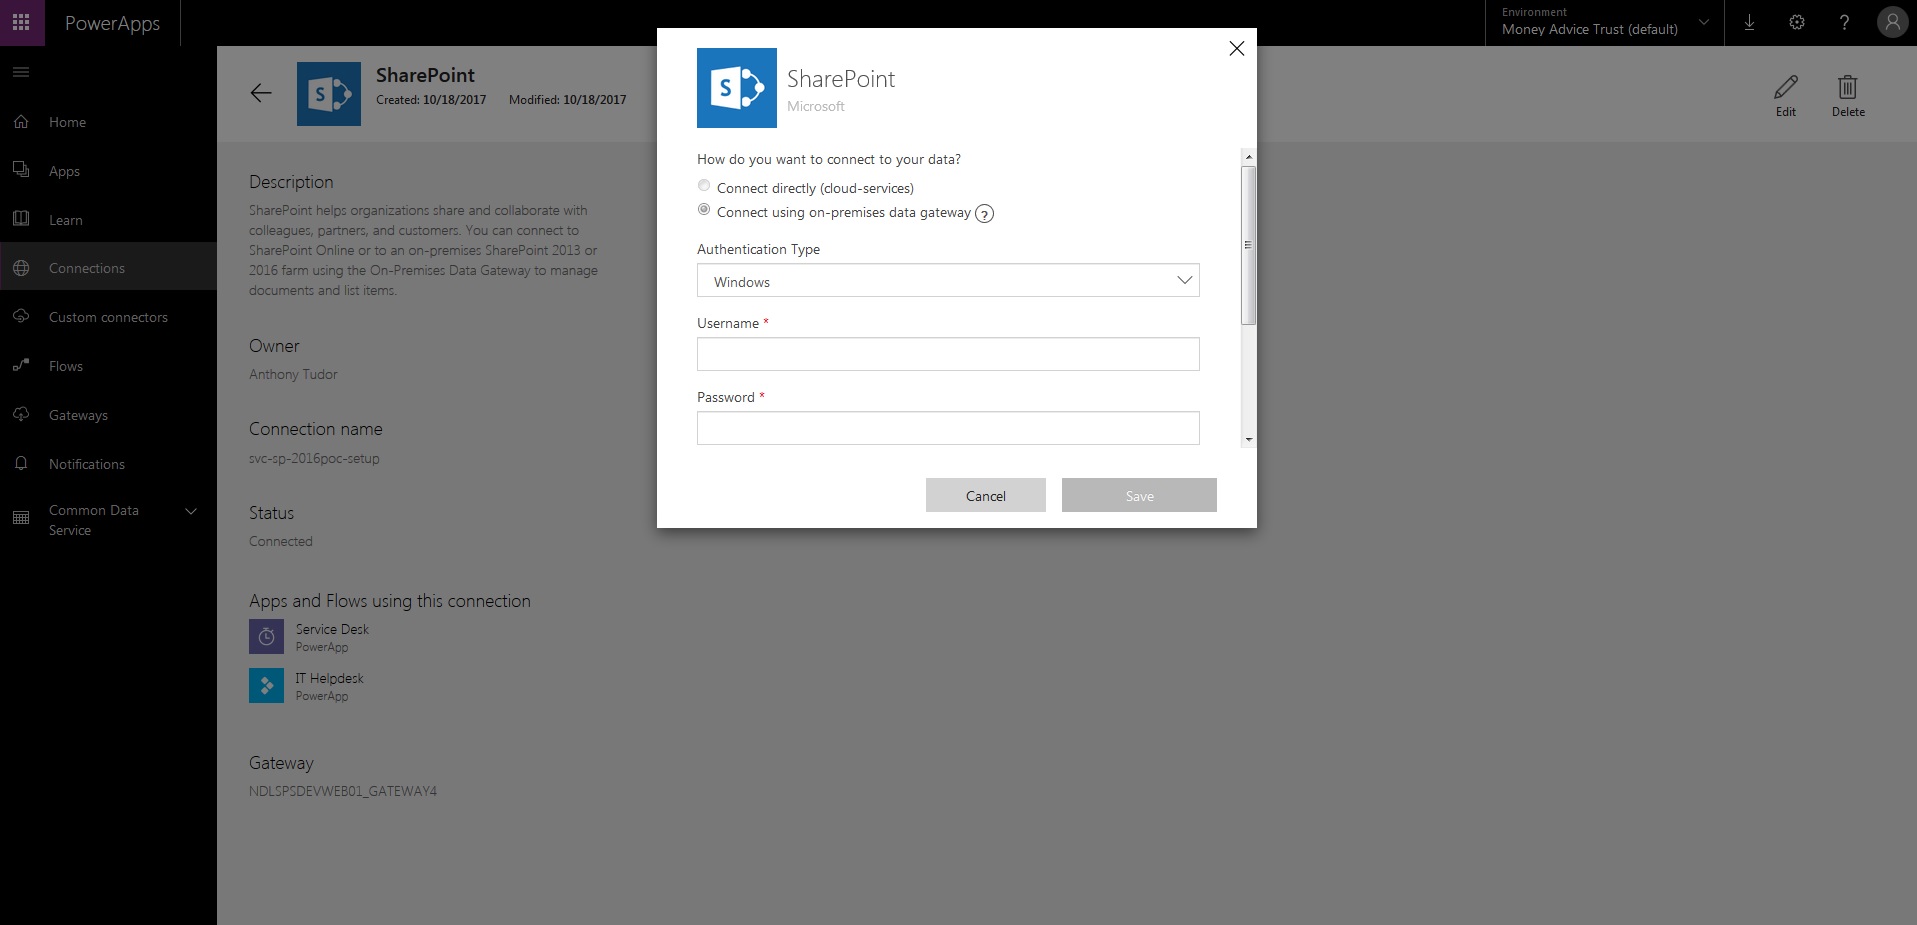
- The SharePoint data connection popup box should appear, under “how do you want to connect to your data?” select Connect using on-premises data gateway
- Set the authentication type to Windows and then specify your username and password (you may need to include a domain name as part of the username)
- Choose the gateway we set up in part 1 of this series, if you can’t see it you might need to install it again or refresh the list until it displays.
- Press Save

I used credentials of a user that had owner permissions for the SharePoint environment I connected to, it makes sense to me that the account you specify here would at the very least need to be able to read/write to the SharePoint list that acts as the data source.
I actually had to create the default gateway using a different account than the one I created my first PowerApp with, so it wouldn’t show for me initially. I had to share the gateway I created and set my PowerApps user as an admin for it to show in this list.
You will now see your newly created data connection appearing in the connections list! Your able to edit and delete the data connection at any point and can also check who the owner is, the connection name and crucially the status of the connection under the details button.
BONUS
There is also this article from Microsoft talking through connecting to SharePoint from PowerApps that lists the known issues with certain column types:
https://docs.microsoft.com/en-us/powerapps/connections/connection-sharepoint-online
Leave a Reply