
Introduction
This post looks at ways in which you can show the folder path of a file as a standalone column within a SharePoint document library view.
UPDATE: I’ve updated this post after some comments asking how to do this for modern SharePoint libraries. Click here for more.
Classic SharePoint
The scenario
A common request I get is:
How do I see what folders/ sub-folders my files are in at a glance
– all users everywhere
Out of the box, there aren’t any columns available that you could potentially leverage to display this information in a standard SharePoint 2010 library.
The solution
So, just by adding one value in SharePoint Designer, here’s how you do it:
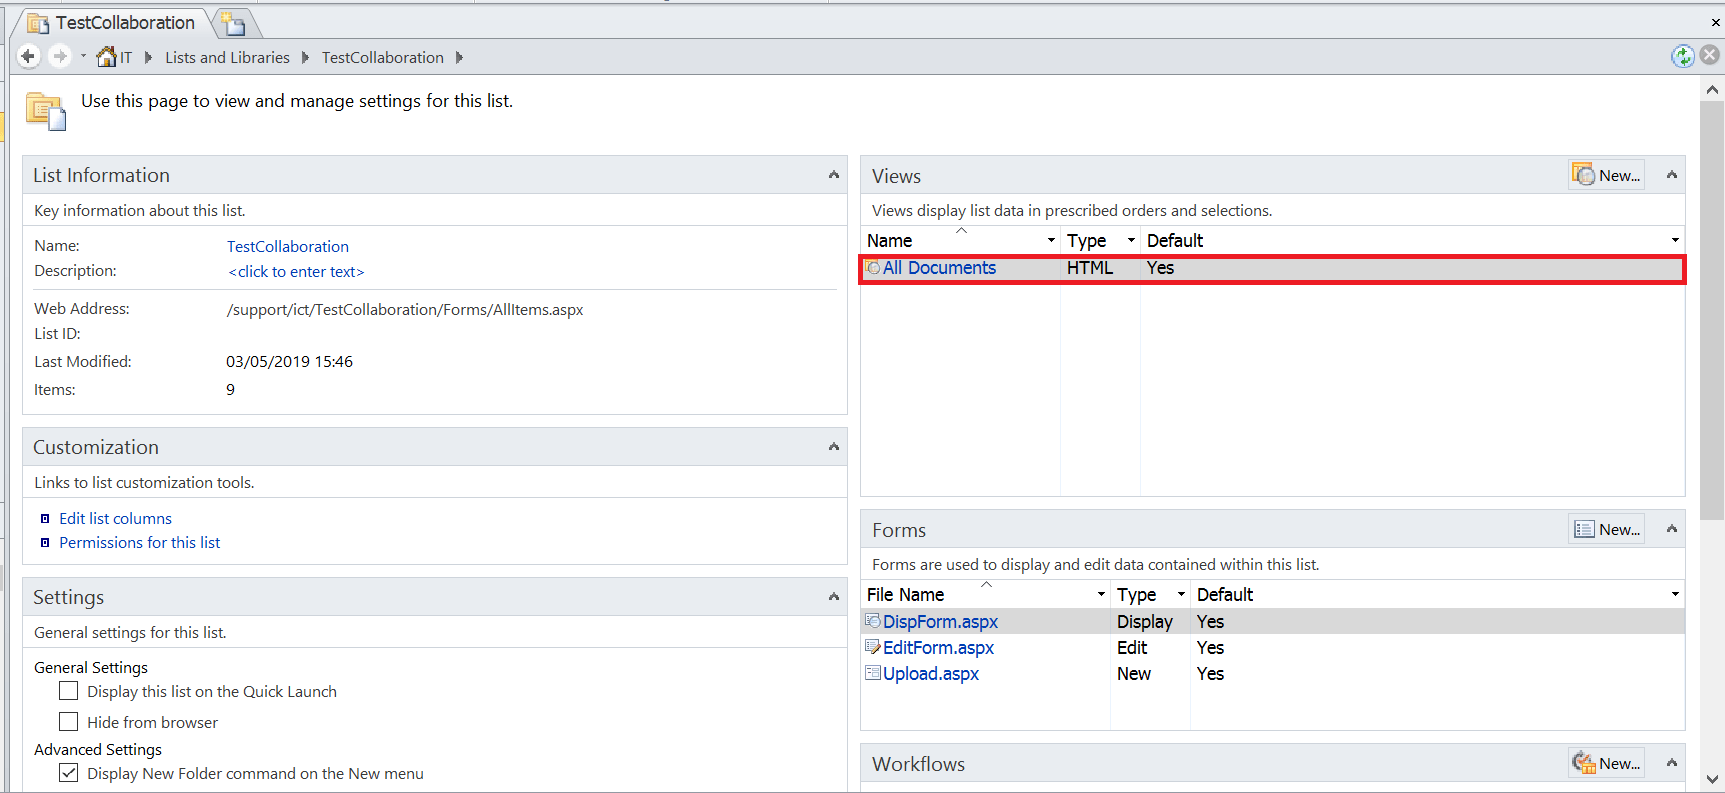
- Navigate to the library you wish to change, create a new view under Library Tools > Library > Create View

- Choose the relevant format of your view, give your view a name and press OK
- Open SharePoint Designer > Open the site > open the library you were just working in
- In the Views pane > click to open the view you just created
- In the code editor window, scroll down until you see something like the following:
<ViewFields>
	<FieldRef Name="DocIcon"/>
	<FieldRef Name="LinkFilename"/>
	<FieldRef Name="Modified"/>
	<FieldRef Name="Editor"/>
</ViewFields>
- Add the following field reference in between the opening <ViewFields> and closing </ViewFields>
- Add the field reference in the display order you would like it to appear in the view

- Press the Save icon to save your changes
- Press the Preview button to see your view in action in the browser

Now you will notice there is a new column being displayed “Path”, that is showing us the full location of the file or folder in the libary. You’ll also notice that this path will display data when at the library root, or in any folders or sub-folders in the library.


Bonus
Taking this one step further, what if we wanted to show files of a certain type, then create a view that groups these files by their folder location? Guess what, that’s exactly what I did!
- Navigate to your library > create a new view as before, this time base your new view off the one you just created
- If you wish to only show files of a particular type, use the filter by settings (for example below is filtered to only shows Word documents)
- Make sure “show all items without folders” is selected
- Press OK

- Back in SharePoint Designer > Open up the view you just created
- Scroll down until you see the opening <Query> tag and add the following beneath it:
<GroupBy Collapse="FALSE" GroupLimit="30">
	<FieldRef Name="FileDirRef"/>
</GroupBy>
Save and preview your view, it should now be grouping by the Path field:

I know this has proven really useful for my company, so hopefully this helps out someone else too 🙂
Modern SharePoint
- The scenario
- The solution
- Bonus #1 – turn your folder path column into a hyperlink column
- Bonus #2 – update existing files in the document library
The scenario
With Microsoft retiring SharePoint 2010 designer workflows, plus the movement away from SharePoint Designer in general, a few readers have asked for a solution that works with modern SharePoint.
When researching this I considered whether suggesting to use SharePoint Designer 2013, as the above solution would still work in SharePoint Online using SPD 2013. But, as Microsoft say themselves although SPD 2013 remains supported, it’s depreciated – so I decided to go in a different direction.
The below example walks you through how you can create a flow in Power Automate to update a file after it’s been created to have the folder path shown in the document library view:
The solution
For this solution you will need to have access to create Flows in Power Automate, as well as an existing Document Library created in SharePoint Online:
- Navigate to the document library you wish to show the folder path for
- Add a single line of text column to the document library > give it a name (I called mine FolderPath)
- Under the ellipsis, press Automate > Power Automate > Create a flow

- In Power Automate, either use an existing, relevant template or start from blank
- The trigger action should be When a file is created (properties only)
- Set the Site Address and Library Name where you want to add the folder path

- Insert a new step > select Update file properties.
- Set the following values for the update file properties step:
- Site Address: same as previous step
- Library Name: same as previous step
- Id: ID
- FolderPath: Folder path

NOTE: The FolderPath within the Update file properties step is the custom column we created earlier. The Folder path (highlighted in red) is dynamic content available within the step in the flow. The folder path dynamic content is the path to the folder the item is in, relative to the site address.

Here’s the flow in it’s entirety:

At this point test and save your flow to make sure it is working as expected 🙂

Bonus #1 – turn your folder path column into a hyperlink column
So if like me you want to take this one step further, wouldn’t it be good if we could easily make our newly showing folder paths, actual hyperlinks to the folders? Well the good news is you can!
- Navigate back to your document library > click on the FolderPath column > Format this column

- Under Apply formatting to make sure FolderPath is selected
- Paste the following JSON into the custom formatting box:
{
  "$schema": "https://developer.microsoft.com/json-schemas/sp/column-formatting.schema.json",
  "elmType": "a",
  "style": {
    "color": "blue",
    "font-weight": "bold"
  },
  "attributes": {
    "target": "_blank",
    "href": "='YOUR SHAREPOINT SITE URL' + @currentField"
  },
  "txtContent": "@currentField"
}
NOTE: for more information on turning field values into hyperlinks, check out this awesome sample from sp-dev-list-formatting.
- Press Save
- Your FolderPath column values should now be legitimate hyperlinks that click through to the relevant folders

Bonus #2 – update existing files in the document library
This was another suggestion from a reader with regards to how to update files that existed in the document library before the flow was created.
Running a flow manually for individual files
When I began to consider how to do this I started by looking at ways to manually start the flow.
It appears the only real way to do this is to create a new column that adds a button next to each file, that allows you to run the flow. I’m not really enamoured by this approach as it doesn’t seem ideal to have an extra column to run a flow showing on every file in your library. If this is something you would like to pursue then I would recommend this great article by WonderLaura who has the process of creating a button to trigger a flow covered!
Update our flow to update all files if folder path is empty
My solution to this problem was to update the flow we created earlier to get the properties for all files in the library, then add a condition that checks if the FolderPath column is empty, then if yes runs our flow as before.
- First, I added a Get files (properties only) action which gets all the files from the source library
- Then I added a new Condition action, which simply checks if the FolderPath column we created is equal to null. You will also notice a new Apply to each action will be created
- I then moved the previous Apply to each action into the “If yes” condition
- I left “If no” blank, as it is ok to leave a condition blank if you don’t want it to do anything
Here’s the updated flow in full, which changes highlighted in red:


Leave a Reply